
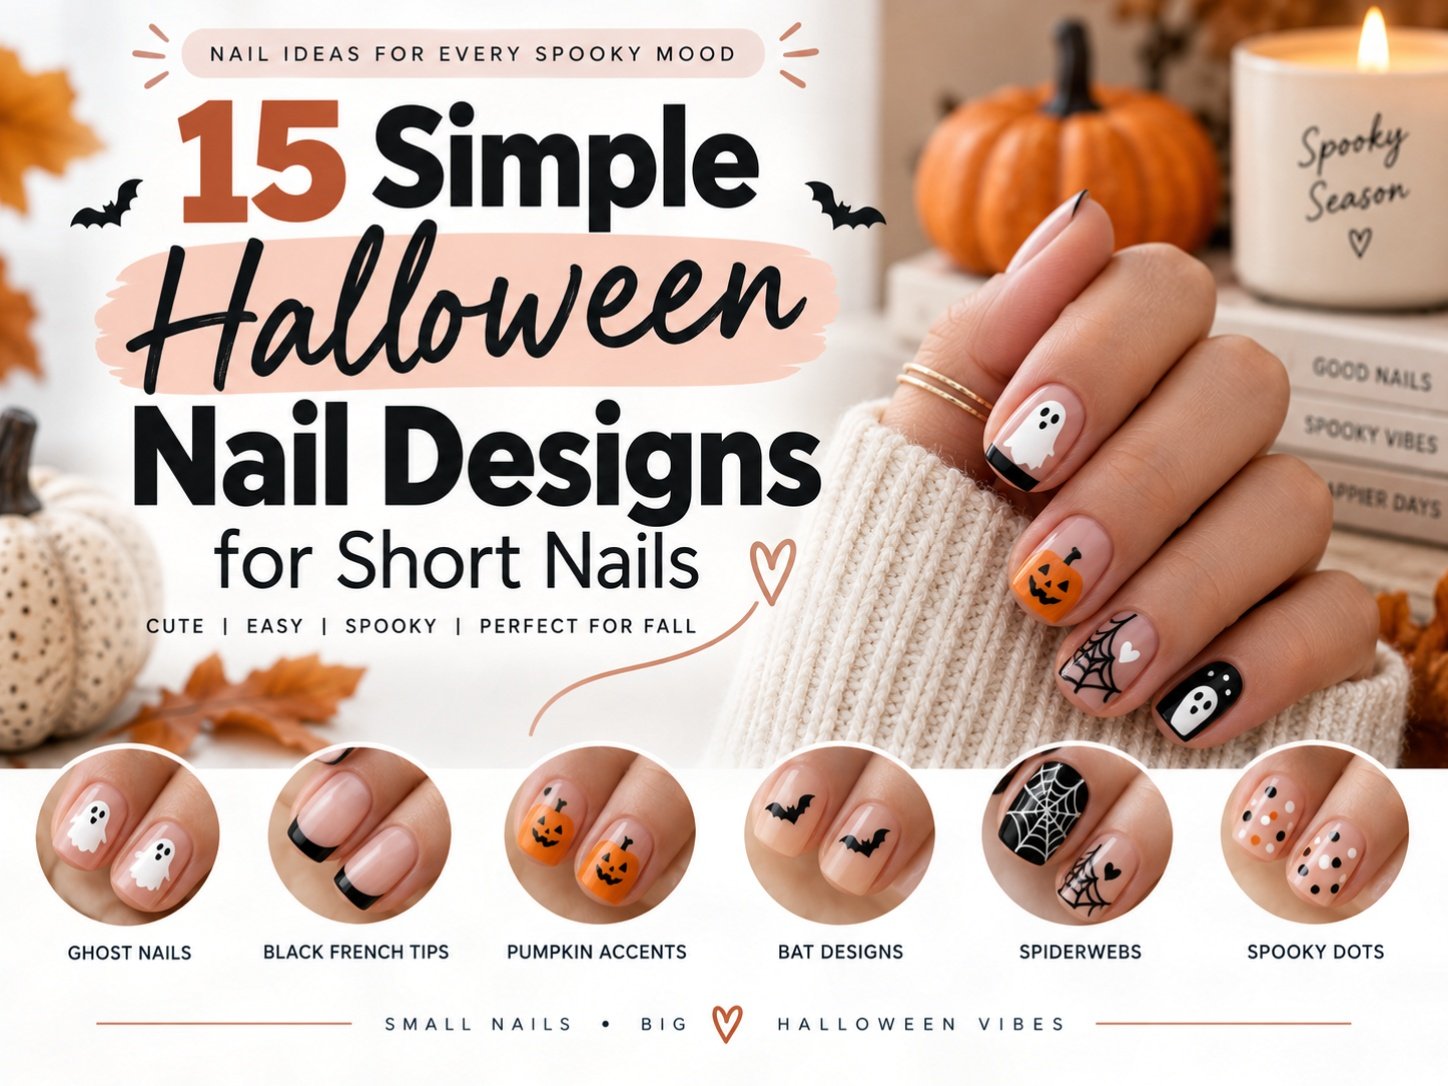
Simple Halloween nail designs for short nails are perfect when you want a festive manicure without long acrylics, complicated salon art, or hours of tiny detail work.
Short nails can still look cute, spooky, polished, and creative. In fact, I think short natural nails are often easier to decorate for Halloween because small designs look intentional instead of crowded. Tiny ghosts, black French tips, pumpkin accents, spiderweb corners, bats, dots, stars, and minimalist spooky details all work beautifully on shorter nail beds.
The key is choosing designs that match the size of your nails. Instead of trying to paint a full haunted house on one tiny nail, use small shapes, strong contrast, negative space, and one or two accent nails.
In this guide, I will share 15 simple Halloween nail designs for short nails, plus difficulty levels, suggested base colors, and practical tips for making small nail art look cleaner.
Why Simple Halloween Nail Designs for Short Nails Work So Well
Simple Halloween nail designs for short nails work because they rely on small, readable details.
You do not need dramatic length to make Halloween nail art look good. Short nails can handle tiny ghosts, mini pumpkins, black tips, orange dots, glitter accents, blood-drip details, and clean spooky lines.
The American Academy of Dermatology’s nail trimming guidance notes that short, well-manicured nails are less likely to harbor dirt and bacteria. That is one reason I like short Halloween nail art for people who want something cute but practical.
For nail health, the American Academy of Dermatology’s manicure and pedicure safety tips recommend moisturizing nails after removing polish because most removers contain chemicals that dry the nails. AAD also recommends not cutting or forcefully pushing back cuticles because cuticles help protect the nail root.
So before the nail art starts, I recommend keeping the base simple: trimmed nails, light shaping, gentle cuticle care, base coat, and a design that does not require harsh removal.
Before You Start: Easy Tips for Cleaner Short-Nail Art
Short nails need a slightly different approach than long nails.
The smaller the nail space, the more important it is to keep the design clean.
My Best Short-Nail Tips
- Use a sheer, nude, black, white, orange, gray, or milky base.
- Choose one detail per nail.
- Keep designs near the tip, corner, or center.
- Use a dotting tool, toothpick, or thin brush for tiny details.
- Let each layer dry before adding the next.
- Use high contrast so small designs show clearly.
- Keep accent nails simple if the rest of the hand is busy.
- Seal everything with top coat.
If your hands are shaky, use dots, stickers, French tips, and simple shapes instead of detailed characters.
1. Tiny Ghost Nails
Difficulty level: Easy
Best base colors: Sheer nude, milky white, pale pink, soft gray, black
Best for: Cute Halloween nails that still feel simple
Tiny ghost nails are one of the easiest Halloween nail designs for short nails because the shape does not need to be perfect.
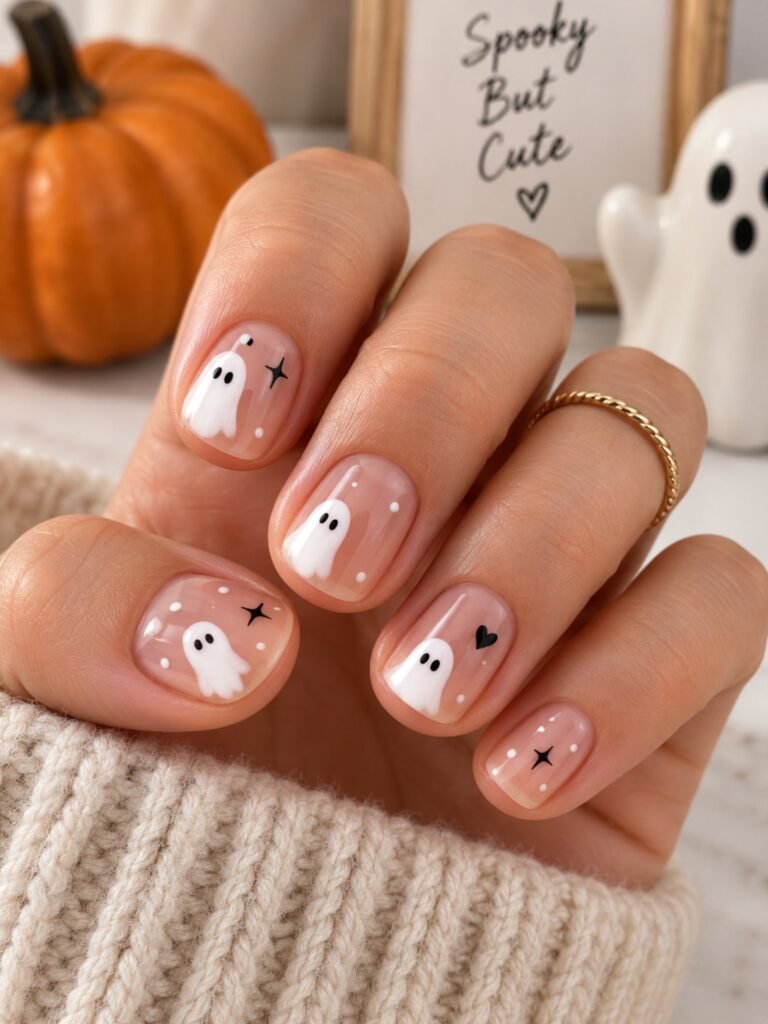
Paint a small white blob near the center or tip of the nail. Add two black dots for eyes and a tiny oval for the mouth. The ghost can be round, wavy, or slightly uneven, which makes this design beginner-friendly.
Clean Nail Art Tip
Use the end of a bobby pin or dotting tool for the eyes. If the ghost feels too plain, add tiny white stars or dots around it.
2. Black French Tips
Difficulty level: Easy
Best base colors: Nude, sheer pink, clear, milky beige
Best for: Minimalist Halloween nails
Black French tips are simple, chic, and easy to wear beyond Halloween night.
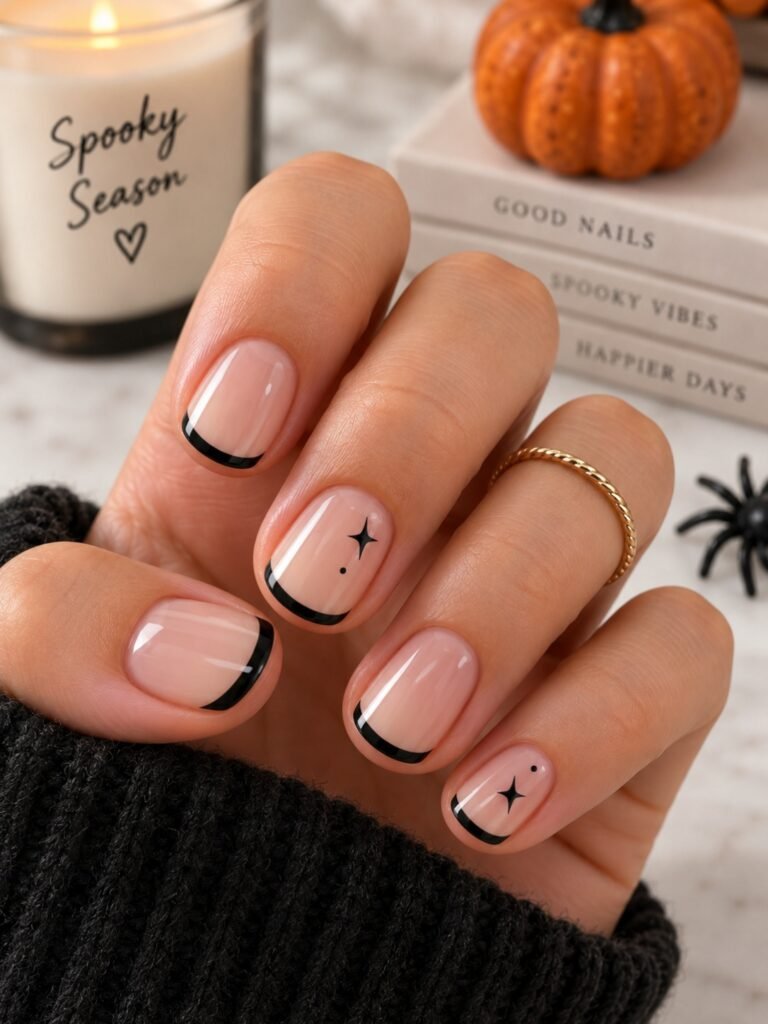
On short nails, keep the tip thin. A thick black tip can make the nail look shorter, while a fine curved line makes the nail look cleaner.
Clean Nail Art Tip
Use nail guide stickers or paint the tip with a small flat brush. Clean the smile line with a tiny brush dipped in polish remover.
The Cleveland Clinic brittle nails guide notes that acetone can dry nails, so I recommend using only a small amount for cleanup and moisturizing afterward.
3. Pumpkin Accent Nails
Difficulty level: Easy to medium
Best base colors: Nude, cream, pale peach, soft beige, black
Best for: Classic Halloween nails with a fall feel
Pumpkin accents look adorable on short nails because they can be painted as tiny rounded shapes instead of full detailed pumpkins.
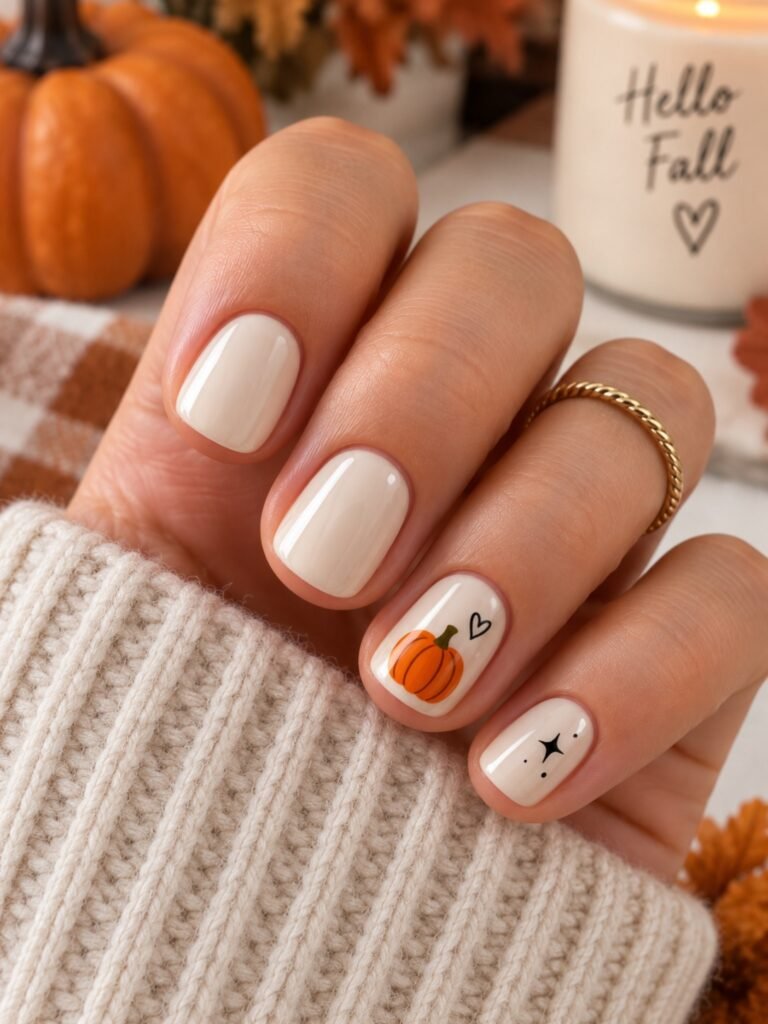
Paint one small orange oval on an accent nail. Add two curved orange lines for pumpkin ridges, then add a tiny brown or green stem.
Clean Nail Art Tip
Keep pumpkins small and place them near the lower corner of the nail. This gives the design breathing room.
4. Orange-and-Black Dot Nails
Difficulty level: Very easy
Best base colors: Nude, white, black, clear, pale gray
Best for: Beginners who want Halloween nail art without drawing
Dots are one of the simplest ways to create Halloween nail art on short nails.
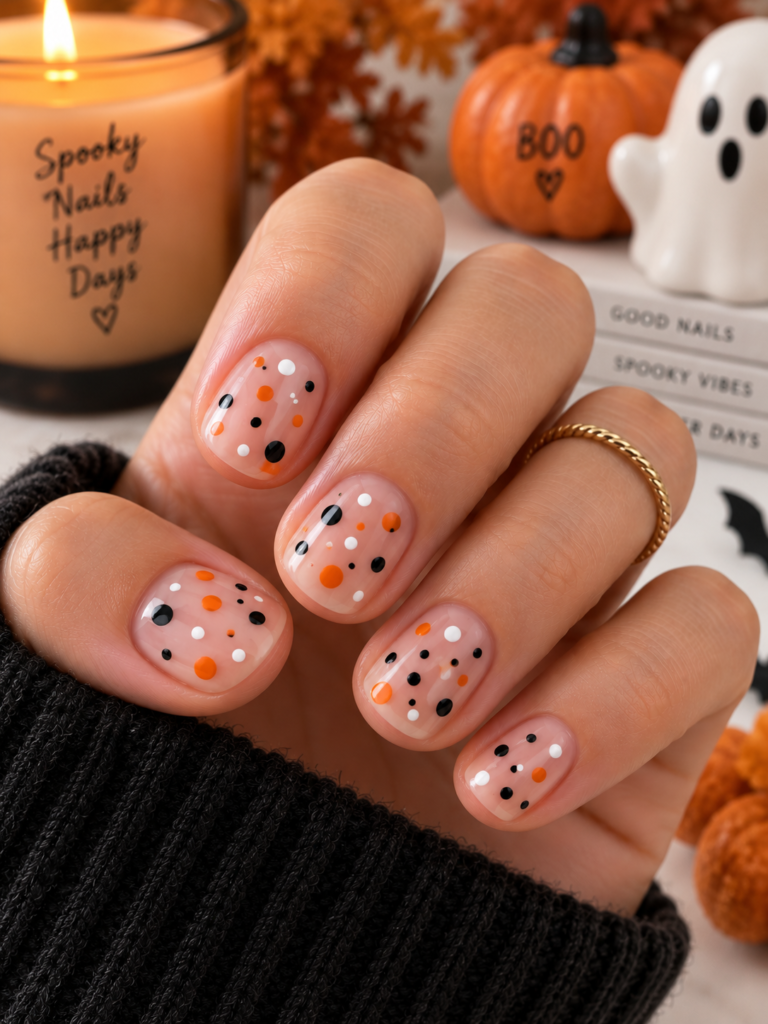
Use orange, black, white, and maybe silver dots in a scattered pattern. You can make every nail different or keep the dots only near the tips.
Clean Nail Art Tip
Use three dot sizes: large, medium, and tiny. This makes the design look intentional instead of messy.
5. Mini Spiderweb Corners
Difficulty level: Medium
Best base colors: Nude, black, gray, purple, milky white
Best for: Spooky but delicate short nails
Spiderweb corners work better on short nails than full spiderwebs because they use less space.
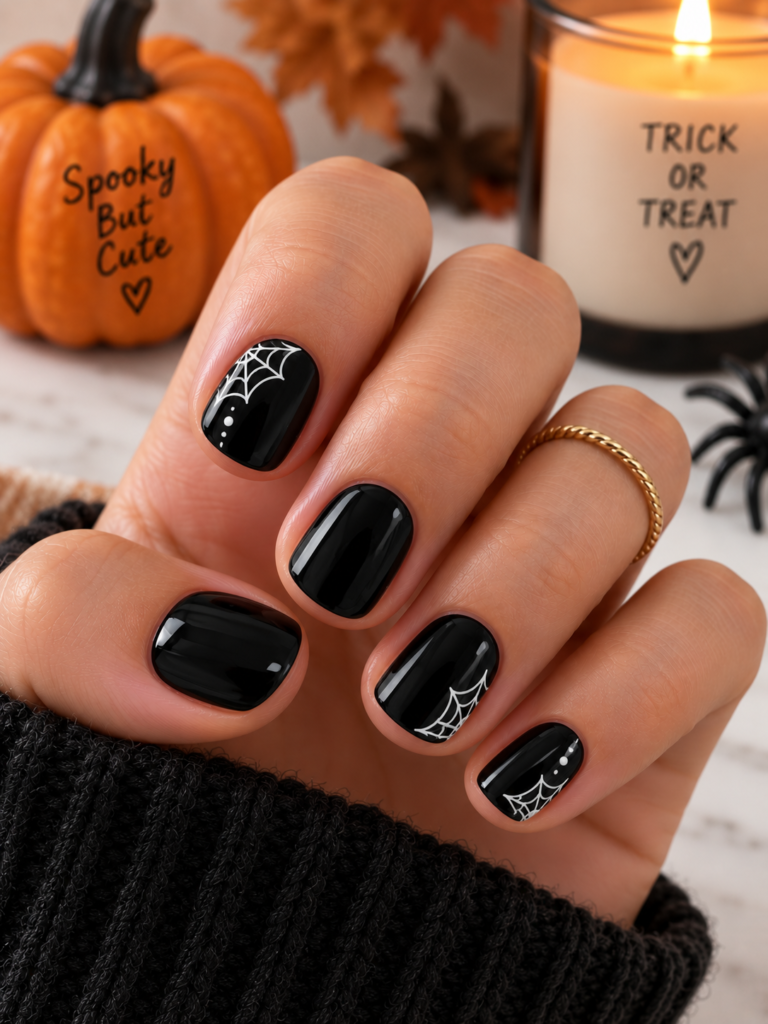
Start with three thin lines coming out from one corner of the nail. Add small curved lines between them to create the web.
Clean Nail Art Tip
Use a very thin nail art brush. Keep the web in one corner only. Too many lines can overwhelm a short nail.
6. Cute Bat Nails
Difficulty level: Medium
Best base colors: Nude, gray, lavender, pale orange, milky white
Best for: Cute Halloween nails with a playful spooky detail
A tiny bat is easier than it looks.
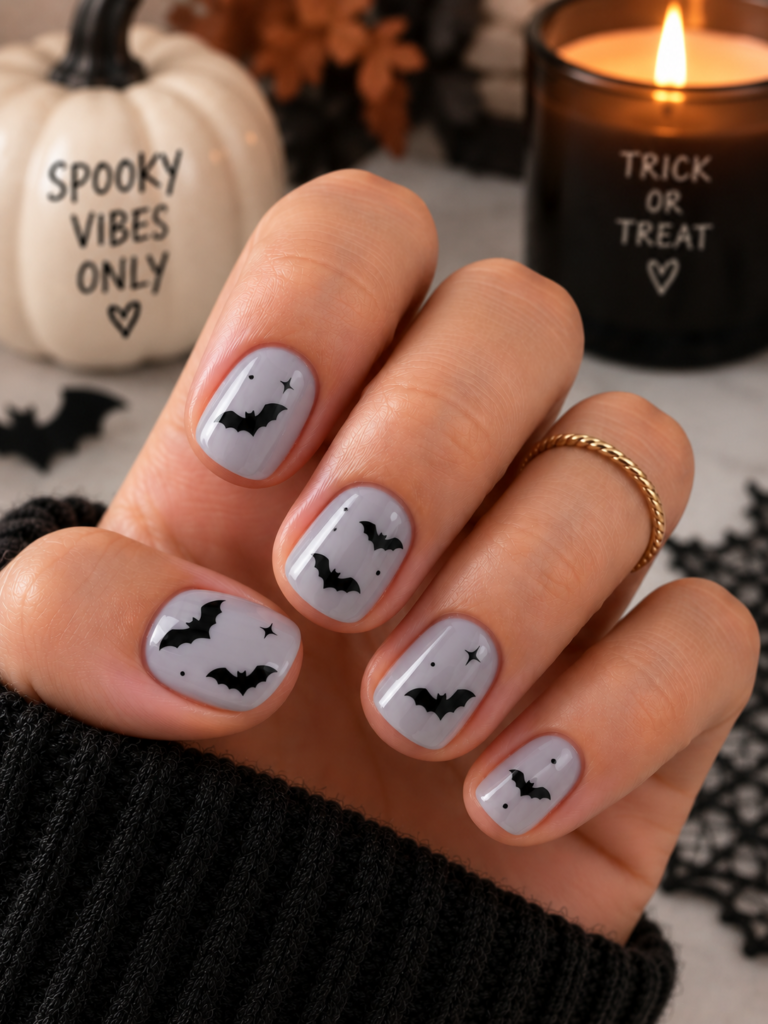
Paint a small black oval for the body, then add two curved wings on each side. You can keep the bat as a silhouette without adding eyes or details.
Clean Nail Art Tip
Do not make the wings too wide. On short nails, a small bat silhouette looks cleaner than a detailed bat.
7. Minimalist Ghost French Tips
Difficulty level: Easy to medium
Best base colors: Nude, sheer pink, milky white
Best for: Soft spooky nails that still look polished
This design combines ghost nails and French tips.
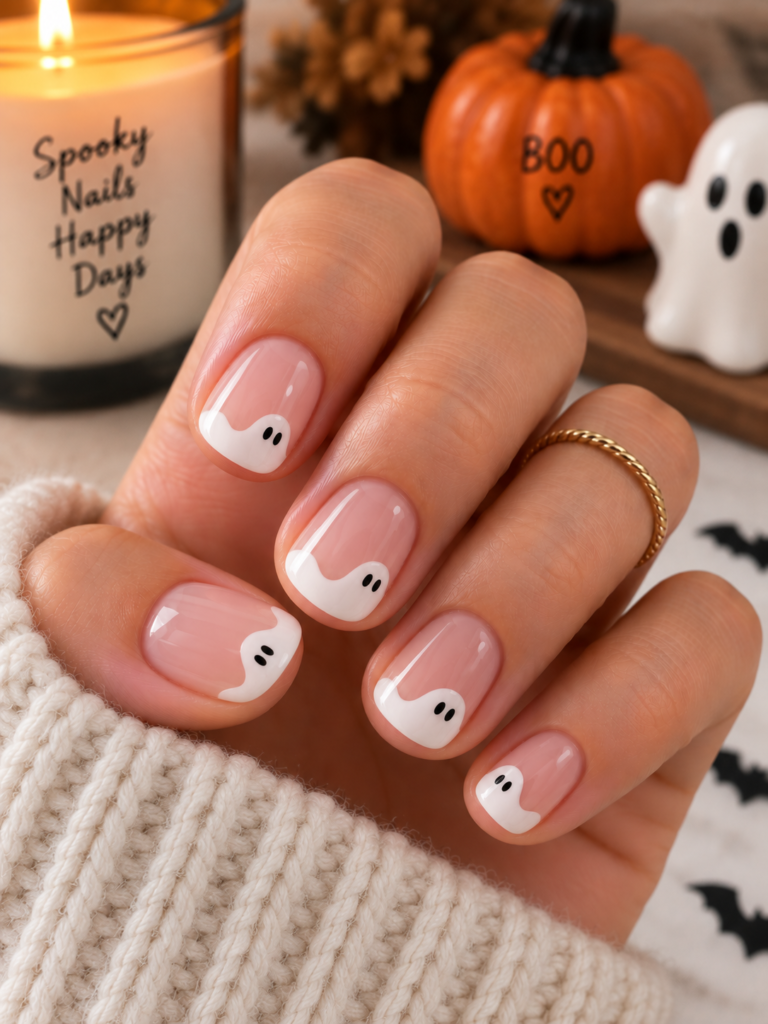
Instead of a regular French tip, paint a wavy white tip that looks like the bottom of a ghost. Add two tiny black eyes near the tip.
Clean Nail Art Tip
Make the ghost face close to the edge of the nail. This keeps the design readable even on short nails.
8. Black Cat Accent Nails
Difficulty level: Medium
Best base colors: Nude, orange, gray, pale pink, white
Best for: Cute Halloween nails with personality
A black cat accent can be as simple as a round black head with two triangle ears.
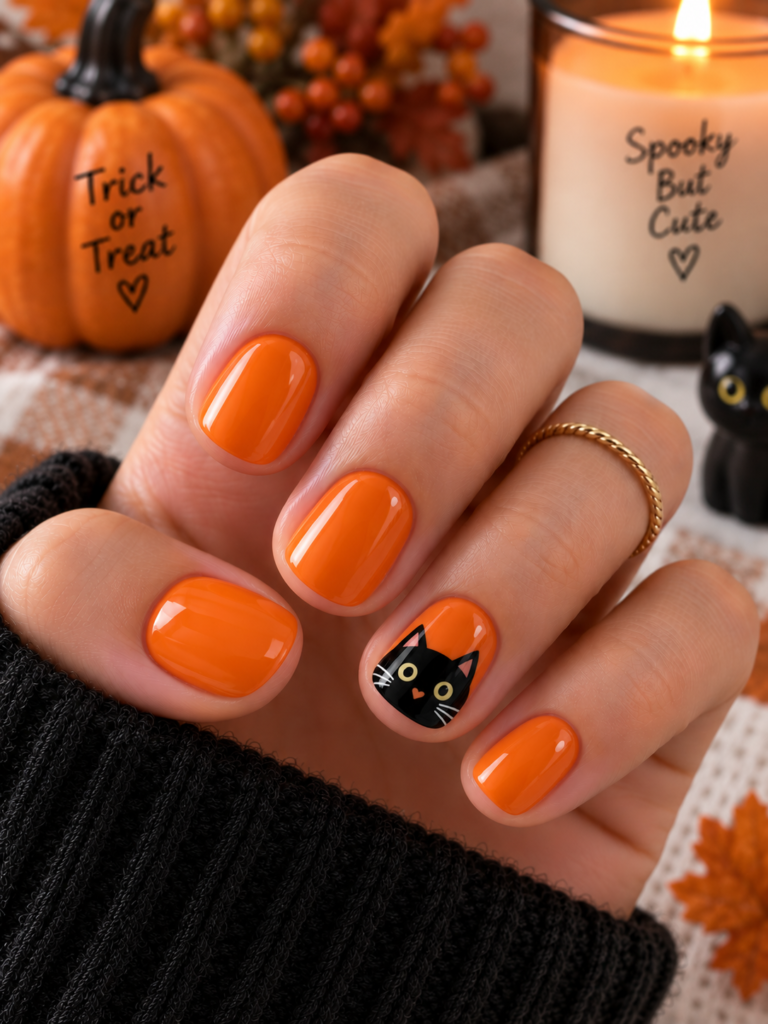
You do not need to paint the whole cat. A tiny cat face on one accent nail is enough.
Clean Nail Art Tip
Use two small dots for eyes and skip the whiskers if your nails are very short. Too many facial details can blur together.
9. Bloody French Tips
Difficulty level: Easy to medium
Best base colors: Nude, sheer pink, milky white
Best for: Spooky Halloween nails with a little drama
Bloody French tips are bold but still simple.
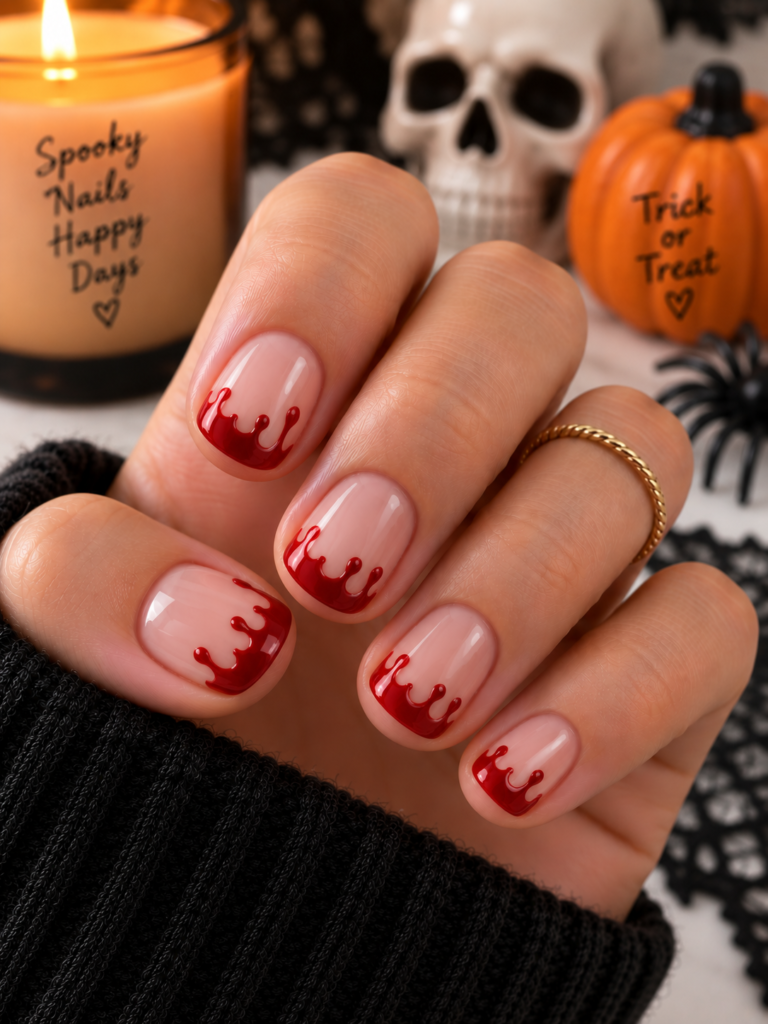
Start with a red French tip, then add two or three small drip lines coming down from the tip. Round the bottom of each drip with a dotting tool.
Clean Nail Art Tip
Keep the drips short on short nails. Long drips can make the nail look crowded.
10. Candy Corn Color Blocks
Difficulty level: Easy
Best base colors: White, nude, clear
Best for: Bright, cute Halloween nails
Candy corn nails are easy because they use simple bands of color.
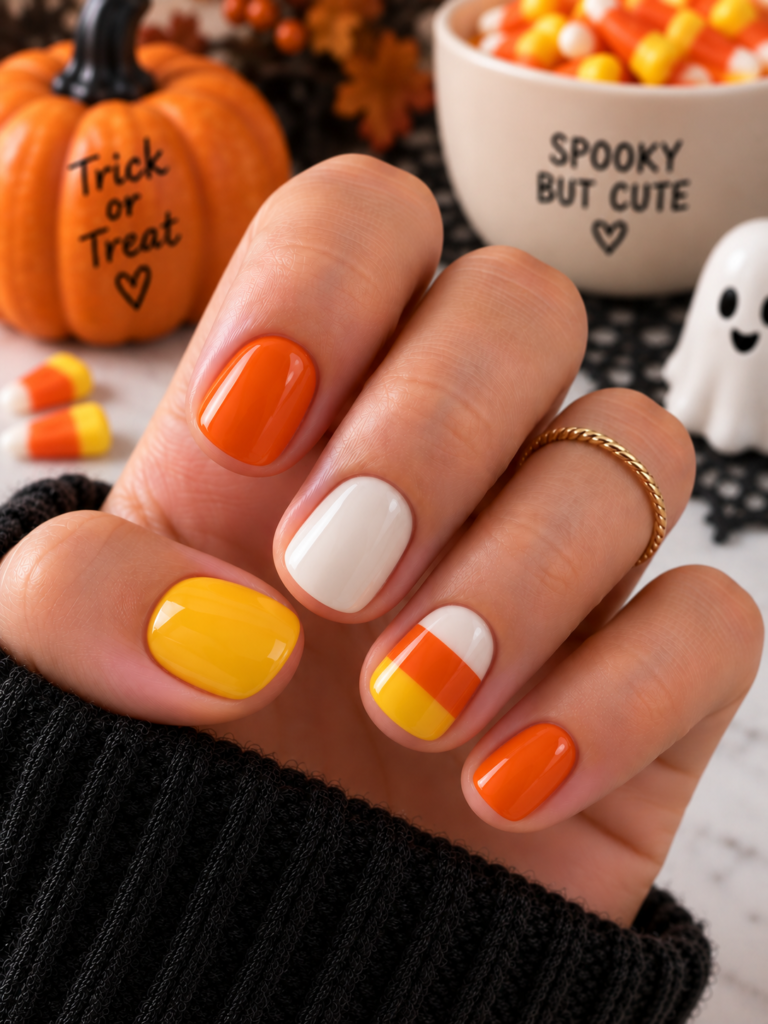
On short nails, I prefer doing candy corn as a small accent instead of full horizontal stripes on every nail. Try one nail with white, orange, and yellow diagonal blocks, then keep the other nails solid.
Clean Nail Art Tip
Diagonal color blocking can make short nails look longer than horizontal stripes.
11. Matte Black Nails With Tiny Stars
Difficulty level: Easy
Best base colors: Black
Best for: Simple spooky nails with a clean finish
Matte black nails look instantly Halloween-ready.
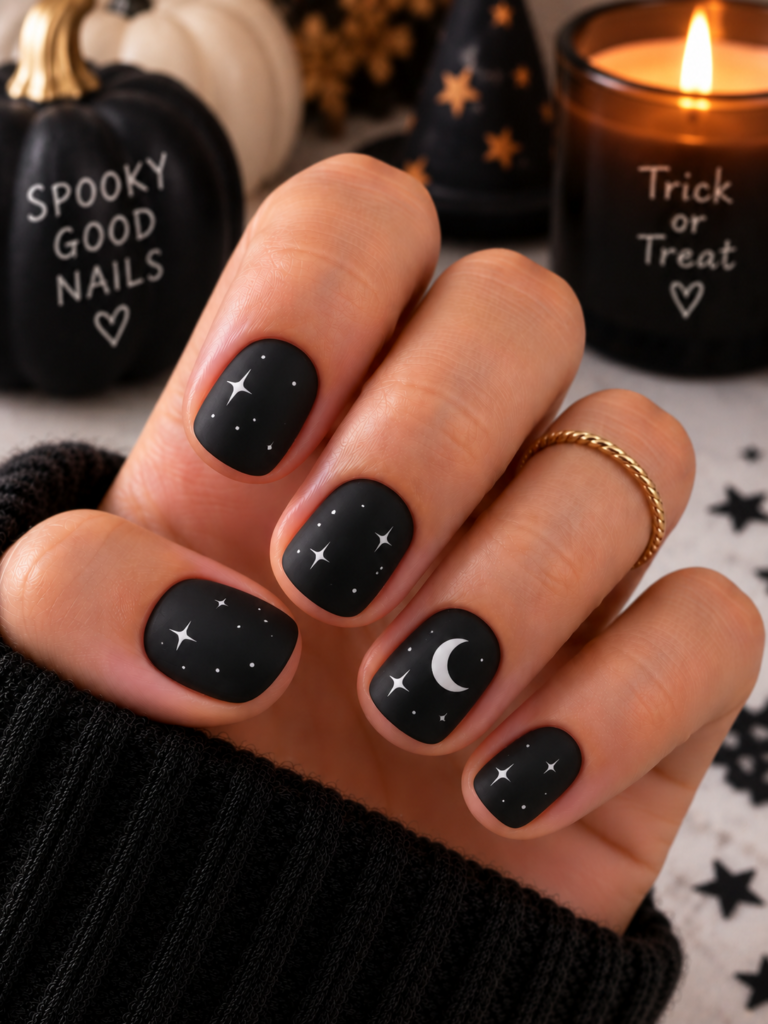
Add tiny white stars, silver dots, or one small moon accent to make the design feel more intentional.
Clean Nail Art Tip
If matte polish shows streaks, use a glossy black base first, then add a matte top coat after it dries.
12. Orange Micro French Tips
Difficulty level: Easy
Best base colors: Nude, sheer pink, clear
Best for: Minimal Halloween nails that are office-friendly
Orange micro French tips are perfect if you want a subtle Halloween manicure.
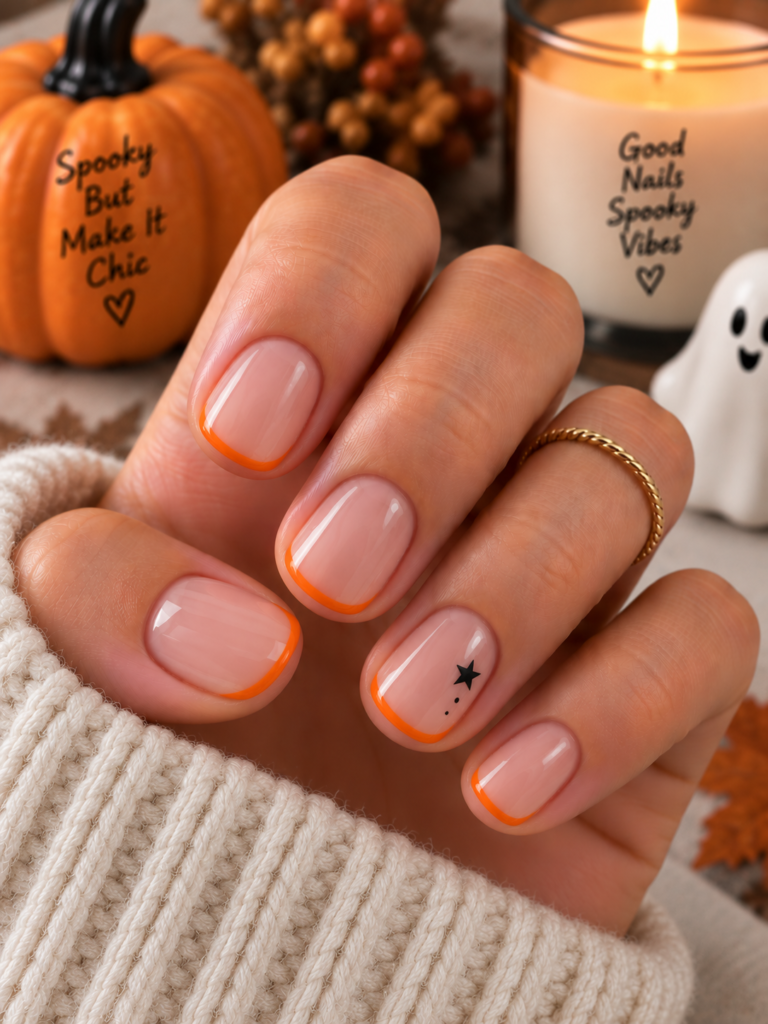
Paint a very thin orange line across the tip of each nail. Add one tiny black dot or star if you want a little extra detail.
Clean Nail Art Tip
Short nails look longer when the tip line is thin and follows the natural curve of the nail.
13. Mummy Wrap Nails
Difficulty level: Medium
Best base colors: Nude, gray, black, milky white
Best for: Fun Halloween nail art that does not require perfect lines
Mummy nails are forgiving because the lines are supposed to look wrapped and uneven.
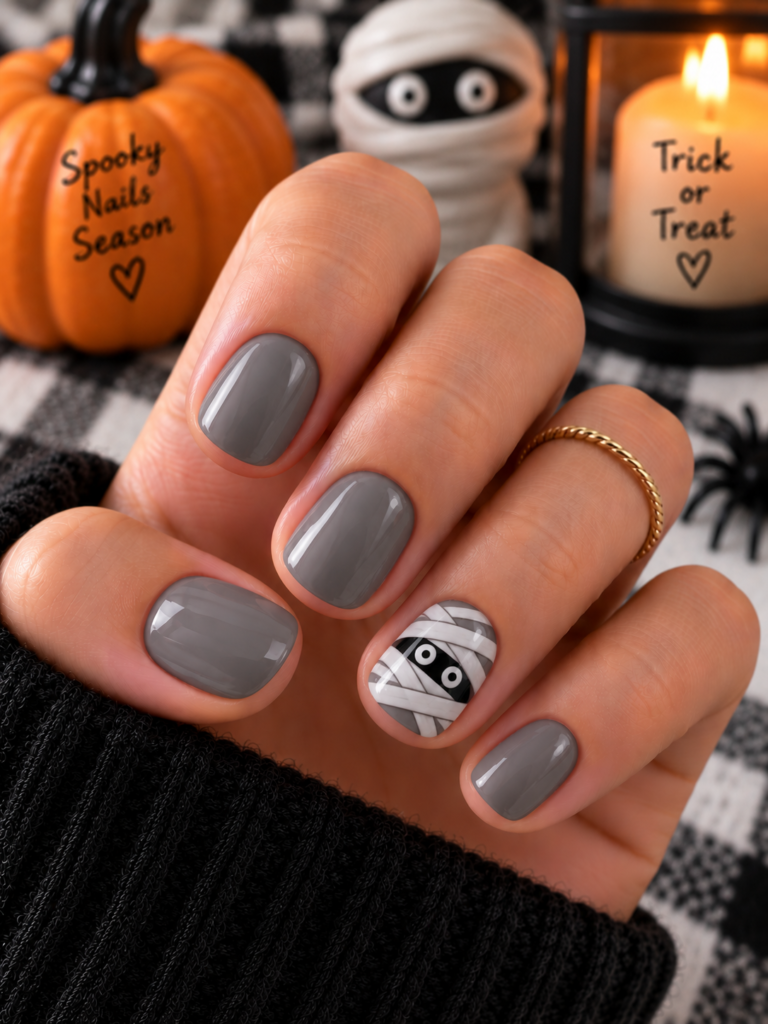
Start with a nude or gray base. Add thin white crisscross lines. Then add two small black dots for eyes peeking through.
Clean Nail Art Tip
Use fewer wrap lines than you think you need. Negative space makes the eyes stand out better.
14. Mini Skull Nails
Difficulty level: Medium
Best base colors: Black, nude, white, gray
Best for: Classic spooky nail art
A mini skull can be simplified for short nails.
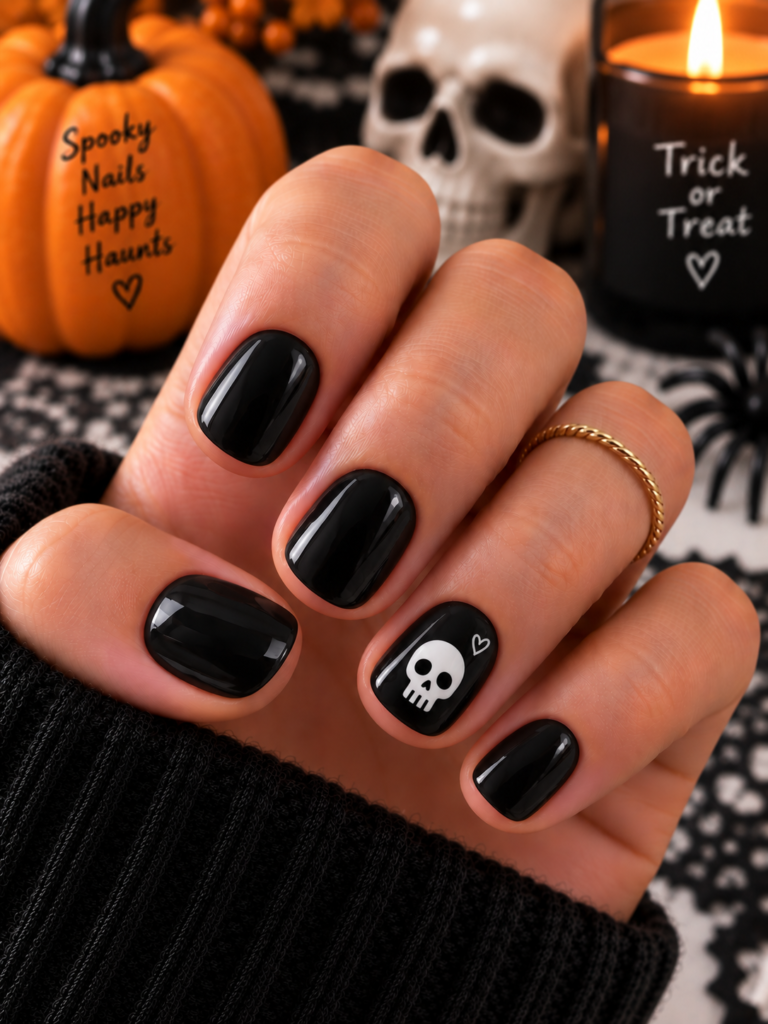
Paint a small white circle or oval. Add two black dots for eyes, a tiny nose, and two small lines for teeth. You do not need a perfect skull shape.
Clean Nail Art Tip
Use the skull only on one accent nail. Keep the rest of the manicure simple with black, nude, or gray polish.
15. Minimal Spooky Mix-and-Match Nails
Difficulty level: Easy to medium
Best base colors: Nude, black, white, gray, orange
Best for: Readers who want variety without complicated art
A mix-and-match Halloween manicure works well on short nails when each nail has one simple detail.
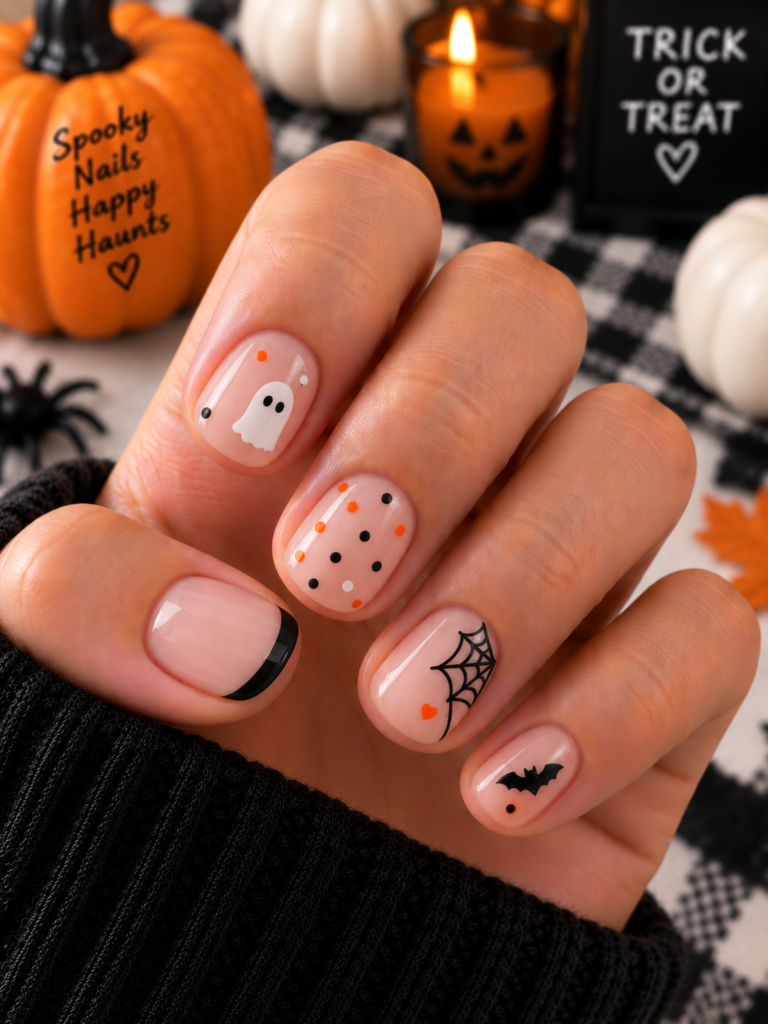
Try:
- Thumb: black French tip
- Index: tiny ghost
- Middle: orange dots
- Ring: spiderweb corner
- Pinky: mini bat
This gives you a full Halloween look without making any single nail too complicated.
Clean Nail Art Tip
Limit the palette to three colors. I recommend black, white, and orange for the easiest version.
The Best Base Colors for Short Halloween Nails
Base color matters because short nails have less space for contrast.
Best Soft Bases
- Nude
- Sheer pink
- Milky white
- Pale gray
- Beige
- Soft peach
These make tiny ghosts, bats, spiderwebs, and pumpkins stand out.
Best Spooky Bases
- Black
- Deep plum
- Charcoal
- Dark green
- Burgundy
- Chocolate brown
These make white stars, moons, webs, and ghost details pop.
Best Cute Halloween Bases
- Orange
- Pumpkin spice
- Lavender
- Cream
- Pale yellow
- Candy corn shades
These work well for cute Halloween nails that feel playful instead of scary.
How to Make Small Halloween Nail Art Look Cleaner
Small nail art can get messy fast, especially on short nails. I recommend using fewer details and cleaner placement.
Use One Focal Point Per Nail
A tiny ghost plus dots is enough. A ghost, bat, pumpkin, web, and glitter on one short nail can look crowded.
Keep Lines Thin
Thin French tips, thin webs, and small stars make the nail look more polished.
Clean Around the Cuticle
A clean edge makes even beginner nail art look better. Use a small brush lightly dipped in remover for cleanup, then moisturize.
The AAD manicure safety guidance recommends moisturizing nails, especially after polish removal, because removers can dry the nails.
Avoid Cutting Cuticles
I recommend softening cuticles and moisturizing instead of cutting them at home. The AAD nail trimming guide explains that cuticles protect the nail root and advises avoiding cutting or pushing them back.
Let Layers Dry
Most messy nail art happens because the next detail goes on too soon. Let the base dry before adding designs, and let the designs dry before top coat.
Easy Tools for Short Halloween Nail Art
This is not an affiliate guide, so I am keeping this simple. You do not need a full nail art kit.
Useful basics include:
- Base coat
- Top coat
- Black polish
- White polish
- Orange polish
- Nude or sheer base polish
- Dotting tool or toothpick
- Thin nail art brush
- Small cleanup brush
- Cotton swabs
- Nail polish remover
- Hand cream or cuticle oil
The FDA nail care products page explains that nail products may include ingredients such as formaldehyde-related ingredients, toluene, and phthalates, and advises consumers to read ingredient statements if they wish to avoid specific ingredients or have sensitivities.
I recommend using products you tolerate well and stopping if you notice irritation, burning, swelling, or a reaction around the nail.
Easy Halloween Nail Design Pairings for Short Nails
If you do not know which designs to combine, use one of these simple sets.
Cute and Simple
- Tiny ghost nails
- Orange dots
- Pumpkin accent
- Nude base
- Glossy top coat
Minimal and Chic
- Black French tips
- Matte black accent
- Tiny stars
- Sheer nude base
- Thin line details
Spooky but Easy
- Bloody French tips
- Spiderweb corner
- Mini skull accent
- Black polish
- Red details
Soft Halloween
- Milky white base
- Ghost French tips
- Pale orange dots
- Tiny moons
- Glossy finish
Classic Halloween
- Orange micro French tips
- Bat accent
- Pumpkin accent
- Black dots
- Nude base
Nail Health Tips Before and After Halloween Nail Art
Halloween nails are fun, but short natural nails still need care.
Before Painting
Trim nails straight across, then gently round the tips. The AAD nail trimming guidance recommends using sharp manicure scissors or clippers and rounding nails slightly at the tips for strength.
After Removing Polish
Moisturize nails and the surrounding skin. This is especially helpful if you use acetone-based remover.
Take Breaks if Nails Feel Weak
If your nails start peeling, splitting, or feeling brittle, take a polish break and focus on moisture.
The Cleveland Clinic nail anatomy guide recommends giving nails regular breaks from polish and using nail moisturizers, especially if nails are brittle.
Watch for Nail Changes
If you notice pain, swelling, green discoloration, dark streaks, lifting, infection signs, or ongoing nail changes, check with a qualified professional. The AAD healthy nail tips recommend seeing a board-certified dermatologist if you notice changes in nail color, texture, or shape.
Common Mistakes to Avoid With Halloween Nails on Short Nails
Making the Design Too Big
Tiny art looks better on short nails. Oversized ghosts, pumpkins, or bats can lose their shape.
Using Too Many Colors
Stick to two or three colors for a cleaner manicure.
Skipping Base Coat
A base coat helps create a smoother surface and may help reduce staining from dark polish.
Overloading the Brush
Too much polish creates blobs instead of small details.
Rushing the Top Coat
If the design is not dry, top coat can smear the art.
Picking Off Polish
Do not peel polish off your nails. It can weaken the nail surface. Remove polish gently and moisturize afterward.
Ignoring Irritation
If a nail product causes burning, itching, redness, swelling, or pain, remove it and stop using it.
Quick 7-Day Halloween Nail Prep Plan
Use this simple plan if you want your short nails to look cleaner before Halloween.
Day 1: Shape the Nails
Trim and file nails into a short round, squoval, or soft square shape.
Day 2: Moisturize
Apply hand cream or cuticle oil and avoid cutting cuticles.
Day 3: Pick Your Design
Choose one easy design or one mix-and-match set.
Day 4: Practice on Paper
Try your ghost, bat, pumpkin, or spiderweb with a toothpick or small brush.
Day 5: Paint the Base
Apply base coat and your chosen base color.
Day 6: Add the Nail Art
Work slowly and keep details small.
Day 7: Seal and Moisturize
Add top coat after the art dries, then moisturize around the nails.
FAQ
What are the easiest Halloween nail designs for short nails?
The easiest Halloween nail designs for short nails are tiny ghosts, black French tips, orange-and-black dots, pumpkin accents, micro French tips, matte black nails with stars, and minimalist spooky mix-and-match nails.
Can short nails look good with Halloween nail art?
Yes, short nails can look very good with Halloween nail art. The key is using small designs, clean lines, high contrast, and one focal point per nail.
What colors work best for simple Halloween nails?
Black, white, orange, nude, gray, burgundy, deep plum, and milky white are some of the best colors for simple Halloween nails. Nude or sheer bases make tiny designs easier to see.
How do I make Halloween nail art look cleaner on short nails?
Use a thin brush or dotting tool, keep designs small, let each layer dry, clean the edges with a small brush, and seal the design with top coat.
Are short nails better for Halloween nail designs?
Short nails are great for simple Halloween designs because small details like ghosts, dots, bats, spiderweb corners, and micro French tips look clean and wearable.
How can I protect my nails after Halloween polish?
Moisturize nails after polish removal, avoid picking polish off, take breaks if nails feel brittle, and avoid cutting cuticles. The American Academy of Dermatology’s manicure safety guidance recommends moisturizing nails after removing polish.
Conclusion
Simple Halloween nail designs for short nails can be cute, spooky, and easy to recreate when you keep the details small.
You do not need long nails or professional-level art to enjoy Halloween nail designs. Tiny ghosts, black French tips, pumpkin accents, spiderweb corners, bats, dots, matte black polish, candy corn blocks, and minimalist spooky details all work well on short natural nails.
I recommend choosing one design style first, keeping the color palette simple, and using tiny details that fit your nail shape. Short nails do not limit your Halloween manicure. They just make clean, simple nail art look even more intentional.
Try a Simple Halloween Nail Look →
Sources
- American Academy of Dermatology: How to Trim Your Nails
- American Academy of Dermatology: Manicure and Pedicure Safety
- American Academy of Dermatology: 11 Dermatologists’ Tips for Healthy Nails
- FDA: Nail Care Products
- Cleveland Clinic: Brittle Nails Causes and Treatment Tips
- Cleveland Clinic: Nail Anatomy