

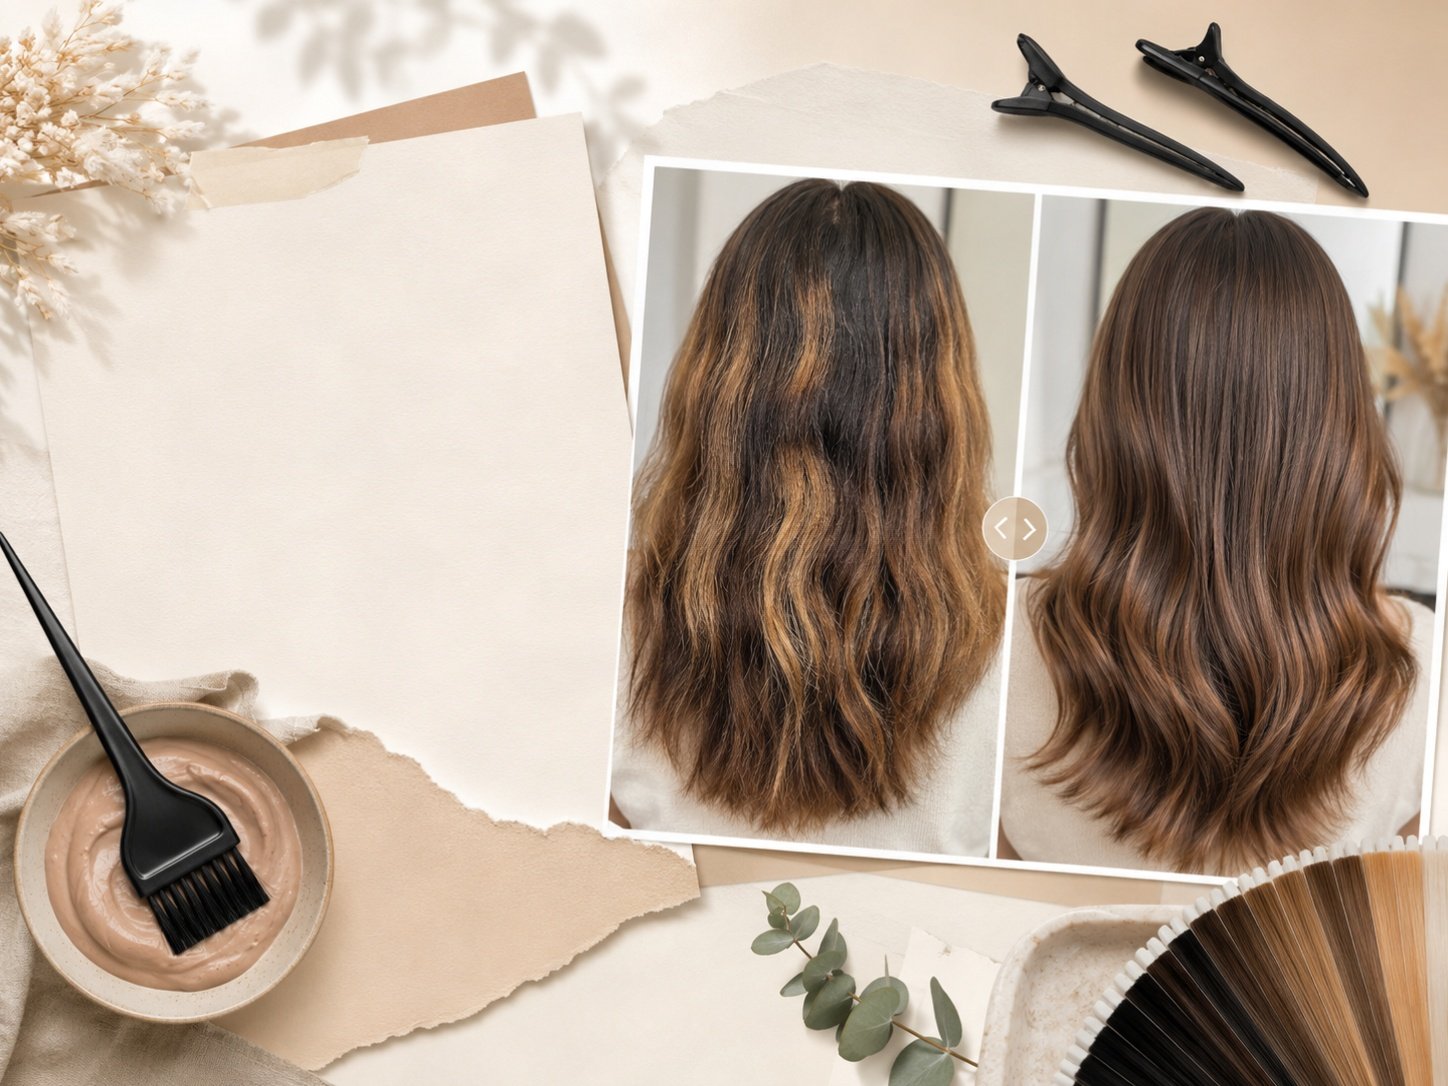
Patchy hair tint can feel so disappointing. You chose the color, followed the timing, rinsed it out, and then noticed uneven spots, lighter ends, darker roots, missed pieces, muddy sections, or random streaks that do not match the rest of your hair. If you are wondering why your hair tint looks patchy and how to fix it, the answer usually comes down to uneven application, product buildup, porosity, old color, not enough saturation, incorrect timing, or choosing a tint that did not match your starting hair color.
In my experience, patchy tint is rarely just “bad luck.” Most of the time, something happened before or during the application that made the color grab unevenly. The good news is that many patchy tint problems can be improved, but the safest fix depends on what caused the patchiness and how your hair feels after coloring.
Before you add more dye, I recommend slowing down and checking the condition of your hair and scalp. The American Academy of Dermatology recommends testing store-bought hair color before using it, and the FDA explains that hair dyes can cause allergic reactions or sensitization, even if you have used dye before without a problem.
This article is for general beauty and hair color education only. If your scalp is burning, swollen, blistering, bleeding, very itchy, painful, or reacting after hair dye, I recommend speaking with a licensed stylist, dermatologist, or qualified healthcare professional before applying more color.
uneven tinted hair sections
Hair tint usually looks patchy because the color did not deposit evenly. This can happen on the roots, ends, highlights, previously dyed areas, bleached sections, or dry and porous pieces.
Patchy tint can show up as:
- Darker roots
- Lighter roots
- Bright ends
- Muddy ends
- Missed sections
- Uneven streaks
- One side darker than the other
- Color that only shows in some places
- Spots that look dull or hollow
- Tint that grabbed too strongly on damaged areas
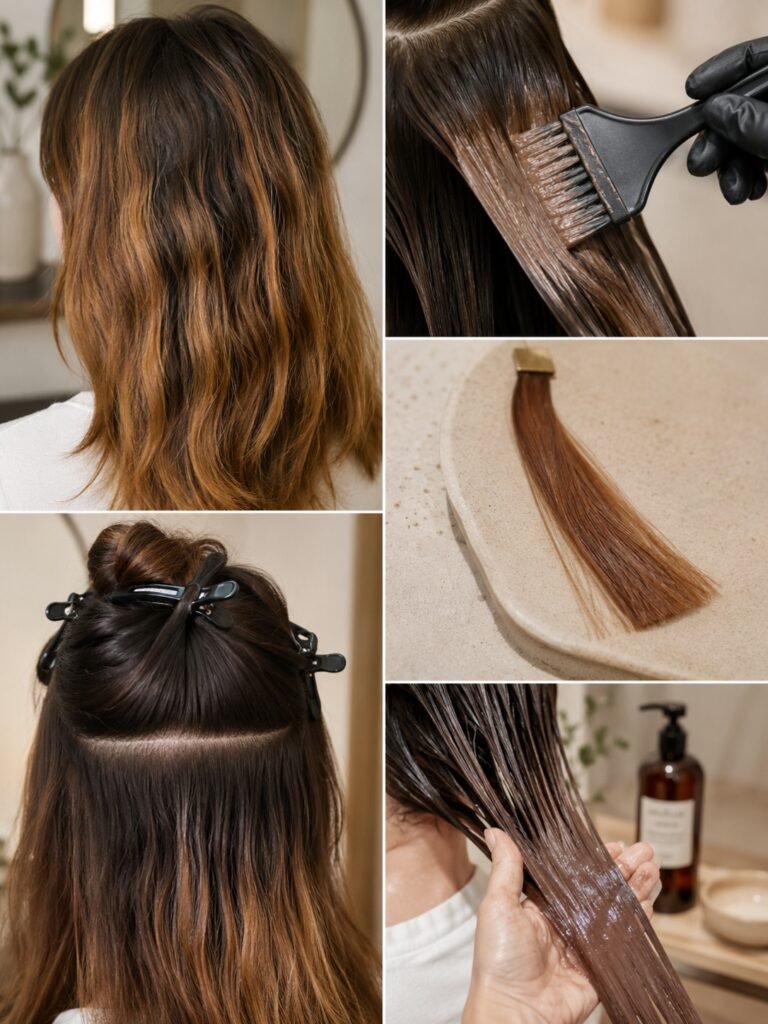
The most important first step is figuring out whether the issue is application, hair condition, starting color, or product choice. Once you know that, you can choose a smarter fix instead of making the color more uneven.
10 Reasons Your Hair Tint Looks Patchy & Fixes
1. Your Hair Was Not Saturated Enough
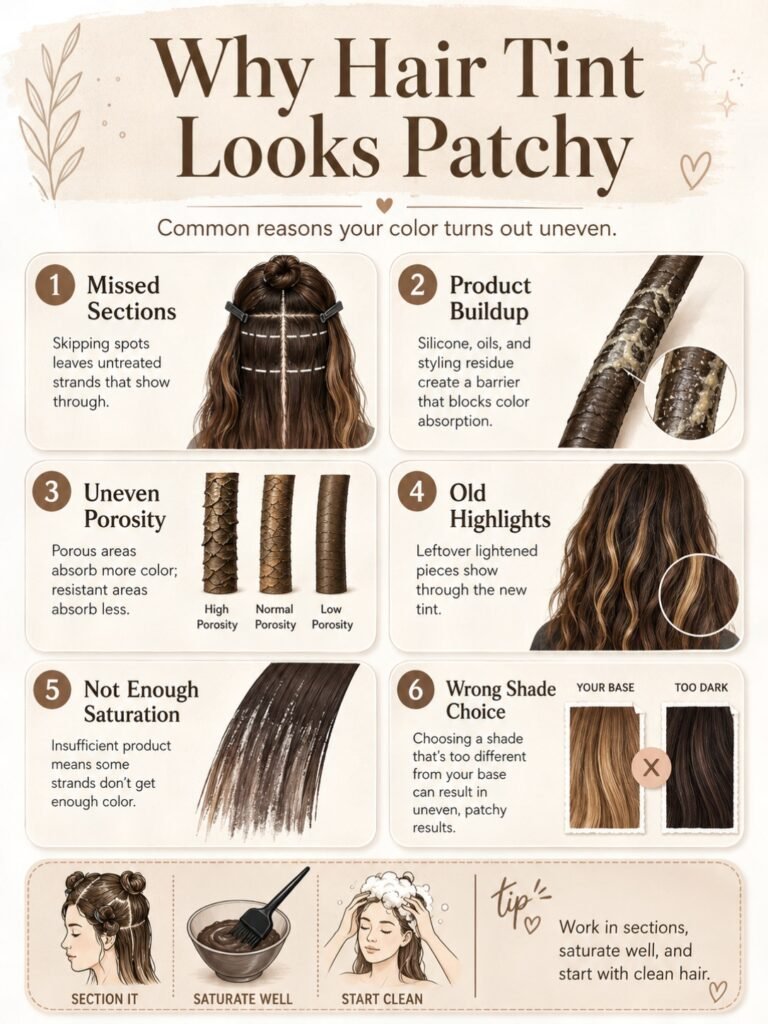
One of the most common reasons why your hair tint looks patchy and how to fix it becomes a problem is poor saturation. Hair tint needs to fully coat the strands. If some sections get plenty of product and others only get a thin layer, the result can look streaky or uneven.
This happens often with thick hair, curly hair, coily hair, long hair, dense roots, and dark hair because it is harder to see which areas are fully covered.
What to try:
- Section your hair before applying tint
- Use small sections instead of large chunks
- Apply enough product to fully coat each section
- Use gloved fingers or a tint brush to work color through
- Check the back of your head with a mirror
- Buy enough product for your hair length and density
If you ran out of product halfway through, that may be the main reason your tint looks patchy.
2. You Applied Tint to Hair With Product Buildup
Tint may not apply evenly if your hair has heavy oils, dry shampoo, gel, edge control, mousse, hairspray, silicone-heavy products, or hard water buildup sitting on the strands.
Buildup can create a barrier, which may stop the tint from coating every area the same way. Some pieces may absorb the color well while coated sections barely change.
The AAD healthy hair tips recommend applying shampoo mainly to the scalp, but before tinting, you should always follow your specific hair color product directions because some formulas work best on clean dry hair while others may suggest slightly unwashed hair.
What to try:
- Check the tint directions before washing
- Avoid applying tint over heavy dry shampoo or oil
- Clarify before tinting if your hair has obvious buildup
- Rinse shampoo thoroughly
- Do not apply conditioner right before tint unless directions allow it
- Start with evenly prepped hair
If your hair felt waxy, coated, oily, or stiff before coloring, buildup may have blocked even color deposit.
3. Your Hair Has Uneven Porosity
Porosity describes how easily hair absorbs and holds moisture or color. Hair that is damaged, lightened, dry, or overprocessed can become more porous. Porous sections may grab tint faster and look darker, brighter, or muddier than healthier sections.
This is common if your ends have old bleach, highlights, heat damage, color remover, relaxer, or repeated dye. The roots may look normal while the ends turn too bright, too dark, or uneven.
The AAD explains that dyed, bleached, or permed hair can become weak, dry, rough, faded, and brittle with sun exposure, which is one reason already processed hair may need more careful color planning.
What to try:
- Do a strand test before applying tint everywhere
- Avoid repeatedly coloring dry or damaged ends
- Use a color-depositing conditioner for a gentler refresh
- Deep condition before future color days, unless product directions say otherwise
- Get a trim if ends are split and rough
- See a stylist for major correction
If only your ends look patchy, your hair condition may be part of the problem.
4. Your Starting Color Was Uneven
Tint does not erase everything underneath. If your hair had old highlights, faded dye, grown-out roots, orange pieces, greenish ends, or uneven bleach, the tint may follow those patterns.
For example, pink tint may look bright on blonde highlights but barely show on brown hair. Purple tint may look vivid on pale ends but muddy on orange sections. Burgundy may look different on roots than on old highlighted ends.
What to try:
- Look at your starting hair color before choosing tint
- Choose shades that work with your current base
- Avoid pastel tint over uneven dark and light hair
- Use a gloss or deeper tint to blend slight unevenness
- See a stylist if the base color is very uneven
- Do not expect one box of tint to correct several old colors
If your hair was already patchy before tinting, the tint probably made the uneven base more visible.
5. You Chose a Tint That Was Too Light for Your Hair
Some shades only show clearly on light or pre-lightened hair. Pastel pink, lavender, baby blue, mint, silver, and pale peach usually need a light base. If you apply those colors to dark hair, they may show only on highlighted pieces or porous ends, which can look patchy.
The AAD recommends choosing a dye within three shades of your natural color and notes that lightening hair more than three shades typically requires higher volumes of peroxide, which can cause more damage.
What to try:
- Choose deeper shades for dark hair
- Try burgundy instead of pastel pink
- Try plum instead of lavender
- Try blue-black instead of baby blue
- Try copper brown instead of peach
- Speak with a stylist if you want a pastel result on dark hair
If the color only showed on your lightest pieces, the tint was probably too light for your base color.
6. You Did Not Section the Hair Properly
Applying tint without sectioning can leave hidden areas untouched. This is especially common at the back of the head, underneath layers, near the nape, around the crown, and behind the ears.
Hair can look fine from the front but patchy when you lift it, curl it, or take photos in bright light.
What to try:
- Divide hair into four main sections
- Clip each section out of the way
- Work in thin slices
- Start where your hair is hardest to reach
- Use a mirror to check the back
- Ask someone to help if your hair is long or thick
Good sectioning can make the difference between smooth color and random missed patches.
7. You Rinsed Too Early or Left It On Unevenly
Processing time matters. If you apply tint slowly and start the timer from the first section, the first area may process longer than the last area. If you rinse too early, some areas may not deposit enough color.
This is one reason I recommend organizing everything before you begin. Gloves, clips, towel, timer, tint brush, and enough product should all be ready.
What to try:
- Read the timing directions before starting
- Work efficiently in small sections
- Start the timer when the product directions say to
- Do not guess processing time
- Do not leave tint on longer than directed
- Rinse all sections thoroughly
If one side of your hair looks much darker than the other, uneven timing may be part of the issue.
8. Your Roots and Ends Absorbed Color Differently
Roots and ends often behave differently. Roots are newer and healthier. Ends are older, drier, and more porous. That means ends may grab color faster or look more intense, while roots may look softer.
The opposite can also happen if roots were very light or freshly grown in and ends had buildup or old dye.
What to try:
- Apply color strategically based on your hair condition
- Do a strand test on roots and ends
- Avoid overlapping tint repeatedly on porous ends
- Use color-depositing conditioner to refresh faded ends gently
- See a stylist if roots and ends are dramatically different
- Use bond-building or moisturizing care if hair feels dry
If your roots and ends look like two different colors, the issue may be uneven porosity or old color history.
9. You Used the Wrong Type of Product
Temporary tint, semi-permanent dye, demi-permanent color, permanent dye, gloss, toner, and color-depositing conditioner do not work the same way. If you expected one product to do the job of another, the result may feel patchy or too subtle.
For example, color-depositing conditioner may refresh faded color but may not cover uneven roots. Temporary spray may sit on top of hair and look uneven if applied too close. Semi-permanent color may not show well on dark hair unless the shade is deep enough.
What to try:
- Read what the product is designed to do
- Choose temporary color for short-term fun
- Choose color-depositing conditioner for refreshes
- Choose gloss for shine and tone
- Choose semi-permanent color for a richer deposit
- Ask a stylist for color correction or major changes
Patchiness can happen when the product does not match the result you wanted.
10. Your Hair Needed Professional Color Correction
Some tint problems are easy to soften at home. Others are better handled by a professional, especially if your hair has bleach, old box dye, color remover, bands of color, green tones, hot roots, or breakage.
If your tint looks severely patchy, very dark, very bright, or chemically stressed, adding more color may make it harder to fix.
What to try:
- Stop applying more dye if hair feels weak or gummy
- Take clear photos in natural light
- Write down what products you used
- Avoid bleach or color remover unless a professional advises it
- Book a color correction consultation
- Be honest about your full color history
A stylist can often create a better plan because they can see the actual base color and hair condition.
How to Fix Patchy Hair Tint at Home
Before fixing patchy hair tint, check three things: your scalp, your hair condition, and the type of patchiness.
If your scalp is burning, swollen, blistering, or painful, do not apply more color. Cleveland Clinic notes that hair dye can irritate the scalp and cause reactions in some people, and you should watch for symptoms like redness, irritation, itching, scaling, flaking, or blisters after coloring. You can read more in Cleveland Clinic’s guide to hair dye safety and signs of dye-related problems.
If You Missed Small Spots
Small missed sections are the easiest to fix.
What to try:
- Reapply tint only to the missed areas
- Use a tint brush for precision
- Follow the same processing directions
- Blend slightly into surrounding color
- Rinse and condition well
- Check in natural light after drying
Avoid recoloring your whole head if only a few small areas are missed.
If the Ends Are Too Bright
Bright ends usually happen because the ends are lighter or more porous.
What to try:
- Use a deeper color-depositing conditioner
- Add a gloss in a softer shade
- Avoid harsh clarifying right away if hair feels dry
- Deep condition after the correction
- Trim dry, split ends if needed
- See a stylist if the brightness is extreme
A deeper gloss can sometimes soften the contrast without a full color correction.
If the Roots Are Too Light
Light roots may happen when the tint did not grab, the base was too dark for the color, or application was uneven.
What to try:
- Reapply the same tint to the root area only if hair and scalp feel healthy
- Choose a slightly deeper shade if the first color was too light
- Use careful sectioning
- Follow product timing exactly
- Avoid overlapping too much color onto the ends
- See a stylist if roots are orange, hot, or banded
If roots are lighter because they were bleached or lifted unevenly, professional toning may be safer.
If the Color Looks Streaky
Streaky tint often comes from poor saturation or uneven sectioning.
What to try:
- Use a gloss or semi-permanent color close to the darker shade
- Apply in thin sections
- Saturate each section fully
- Comb gently only if product directions allow
- Process evenly
- Condition afterward
If the streaks are caused by old highlights, a soft gloss may blend them better than another bright tint.
If the Tint Is Too Dark in Some Areas
Dark patches can happen when porous areas grab too much pigment.
What to try:
- Wash once with a gentle shampoo if the product is fresh and semi-permanent
- Avoid using color remover without guidance
- Deep condition if hair feels dry
- Wait a few washes to see if it softens
- Use clarifying shampoo only if hair is strong enough and the product type allows it
- See a stylist if dark patches are severe
Do not bleach over dark patches at home unless you are trained. That can create more unevenness and damage.
What Not to Do When Hair Tint Looks Patchy
Do Not Keep Adding Random Color
Adding more color without a plan can make the patches darker, muddier, or harder to correct.
Do Not Bleach Immediately
Bleach can worsen damage and may lift patchy color unevenly. If your hair already feels dry, gummy, stretchy, or fragile, avoid more chemical processing.
Do Not Use Color Remover Without Understanding the Risk
Color remover can be unpredictable, especially over layered box dye or fashion colors.
Do Not Scrub Your Scalp
If your scalp is irritated, scrubbing can make it worse.
Do Not Judge the Color While Wet
Hair color often looks darker when wet. Let it dry fully and check in natural light before deciding what to do.
Do Not Skip the Strand Test Next Time
A strand test is one of the easiest ways to prevent another patchy result.
My Simple Plan for Fixing Patchy Hair Tint
When tint comes out patchy, I like to use a calm, step-by-step approach.
Step 1: Let the Hair Dry Fully
Do not judge the final result while the hair is wet. Dry hair shows the true placement and tone better.
Step 2: Check Hair in Natural Light
Bathroom lighting can make color look warmer, darker, or more uneven. Look near a window or outside in indirect daylight.
Step 3: Identify the Pattern
Ask yourself:
- Are the roots patchy?
- Are the ends too bright?
- Are there missed sections?
- Did only highlights grab the color?
- Is the color darker on damaged pieces?
- Is the whole color uneven or only one area?
Step 4: Check Hair Condition
If your hair feels soft and strong, a small correction may be possible. If it feels dry, rough, gummy, stretchy, or brittle, focus on conditioning and get professional help.
Step 5: Choose the Smallest Fix
Fix only the problem area when possible. Do not recolor your whole head if the issue is a few missed spots.
Step 6: Use a Deeper Gloss for Blending
If the color is uneven but not terrible, a deeper gloss or color-depositing conditioner may help soften the contrast.
Step 7: Ask a Stylist for Serious Patchiness
If there are bands, hot roots, green tones, severe dark spots, or damage, professional color correction is safer.
How to Prevent Patchy Hair Tint Next Time
Patchy tint is easier to prevent than fix. Here is what I recommend before your next color day.
Prep the Hair Properly
Follow the product directions. If your hair has heavy buildup, clarify a few days before tinting so the color can coat more evenly.
Do a Strand Test
The FDA recommends doing a patch test before dyeing your hair, and I also recommend doing a strand test for the color result. A strand test shows how the shade will look on your real hair.
Section Carefully
Divide your hair into sections and work in thin slices. This helps prevent missed areas.
Use Enough Product
One box or tube may not be enough for long, thick, curly, or coily hair. If you use too little, the color may look patchy.
Match the Shade to Your Base Color
Do not expect pastel color on dark hair without lightening. Choose shades that work with your current color.
Avoid Coloring Damaged Ends Repeatedly
Porous ends can grab color strongly and look too dark or muddy. Refresh with gentler products when possible.
Keep Hair Healthy After Tinting
The AAD recommends using conditioner after shampooing, and conditioner can help color-treated hair feel softer and more manageable.
Best Products and Tools for Fixing Patchy Hair Tint
You do not need everything, but the right tools can help you apply color more evenly next time.
For Even Application
Look for:
- Tint brush
- Mixing bowl
- Sectioning clips
- Gloves
- Wide-tooth comb
- Old towel
- Timer
- Hand mirror
- Barrier cream
- Applicator bottle
For Gentle Blending
Look for:
- Color-depositing conditioner
- Semi-permanent gloss
- Color-safe shampoo
- Moisturizing conditioner
- Leave-in conditioner
- Deep conditioner
- Bond-building treatment if your hair tolerates it
The AAD leave-in conditioner tips explain that leave-in conditioner can help reduce frizz, static, and flyaways while making hair easier to detangle and style, which can be helpful if color-treated hair feels dry or rough.
For Safety and Cleanup
Look for:
- Petroleum jelly or barrier cream
- Disposable gloves
- Dark towel
- Stain remover for surfaces
- Old shirt
- Shower cap
- Clear product directions
- Emergency care guidance if you react
If a product causes burning, swelling, rash, or severe itching, stop using it and get professional advice.
When to See a Professional Stylist
I recommend seeing a professional if the patchiness involves:
- Bleach
- Hot roots
- Orange bands
- Green tones
- Very dark patches
- Severe unevenness
- Hair breakage
- Gummy or stretchy hair
- Previous box dye layers
- Color remover
- A scalp reaction
- A major color change
A professional can assess your hair history, porosity, and base color before applying more chemicals.
FAQ
Why does my hair tint look patchy?
Your hair tint may look patchy because of uneven application, not enough product saturation, product buildup, uneven porosity, old color, damaged ends, missed sections, incorrect timing, or choosing a shade that did not match your starting hair color.
Can I fix patchy hair tint at home?
You may be able to fix small missed spots or mild unevenness at home by applying tint only to the patchy areas, using a deeper gloss, or refreshing with a color-depositing conditioner. If the patchiness is severe, banded, orange, green, or damaged, see a stylist.
Should I dye my whole head again if my tint is patchy?
Not always. If only a few areas are patchy, recoloring your whole head may make the rest of your hair too dark or uneven. Fix the smallest area possible.
Why did my ends grab more color than my roots?
Your ends may be more porous from old dye, bleach, heat damage, dryness, or age. Porous hair can absorb tint faster and look darker, brighter, or muddier.
Why did my hair tint only show on my highlights?
Highlights are lighter than the rest of your hair, so they can show tint more clearly. If your base hair is dark, the same tint may barely show on darker sections.
Can I use clarifying shampoo to fix patchy hair tint?
Clarifying shampoo may soften some fresh semi-permanent tint, but it can also dry the hair and may not fix true unevenness. Be careful if your hair is damaged, bleached, or very dry.
How do I prevent patchy hair tint next time?
Prevent patchy tint by doing a strand test, sectioning your hair, using enough product, applying the tint evenly, matching the shade to your starting hair color, and avoiding tint over heavy buildup.
Is patchy hair tint caused by damaged hair?
It can be. Damaged or porous hair can grab color unevenly, especially on dry ends, bleached pieces, or previously colored sections.
Can I put darker tint over patchy hair?
Sometimes a darker gloss or semi-permanent tint can help blend patchiness, but it can also make porous sections too dark. Do a strand test first.
When should I not fix patchy hair tint at home?
Do not fix it at home if your scalp is reacting, your hair feels gummy or breaking, the color is severely uneven, or the problem involves bleach, green tones, orange bands, or multiple old dye layers.
Conclusion
Now you know why your hair tint looks patchy and how to fix it without making the problem worse. Patchy tint usually happens because of uneven saturation, product buildup, damaged or porous hair, old color, poor sectioning, incorrect timing, or a shade that was not right for your starting color.
I recommend starting with the smallest safe fix. Dry the hair, check it in natural light, identify the patchy areas, and avoid rushing into a full recolor. Small missed spots may be touched up carefully. Uneven ends may need a gloss or color-depositing conditioner. Severe patchiness, hot roots, green tones, breakage, or scalp irritation should be handled by a professional.
A patchy tint result is frustrating, but it is also a lesson. Next time, section carefully, use enough product, do a strand test, choose a realistic shade, and protect your hair condition before adding color.